Overview
In this two part series article, I am going to show you how to configure Webpack to get started with your next project using html, javascript, and css(more specifically PostCSS). The Webpack is our choice for bundling all the necessary resources together in order for our website to work.
Then what is Webpack? According to Webpack's official documentation, Webpack is:
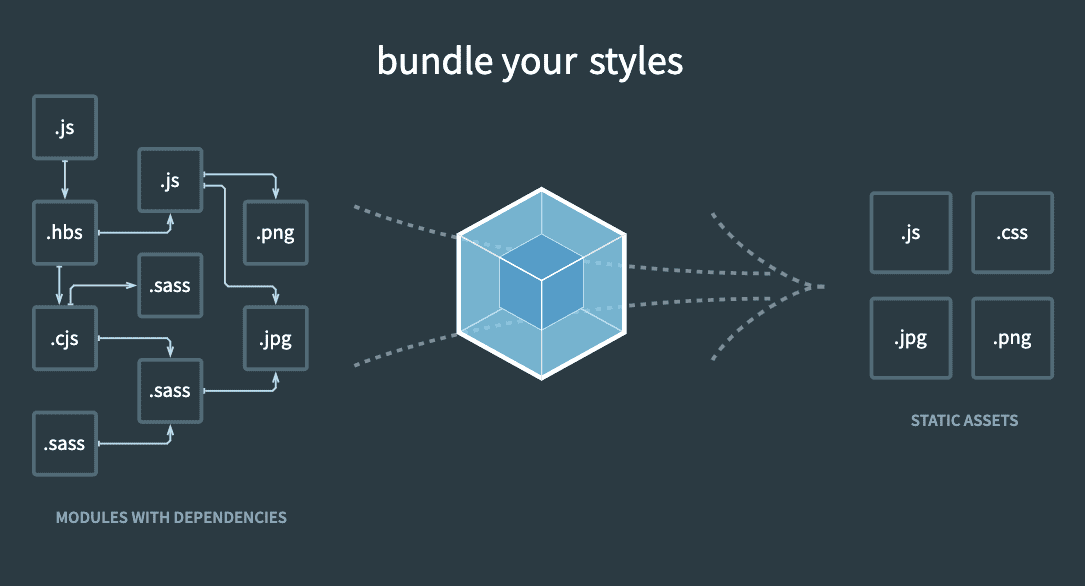
At its core, webpack is a static module bundler for modern JavaScript applications. When webpack processes your application, it internally builds a dependency graph from one or more entry points and then combines every module your project needs into one or more bundles, which are static assets to serve your content from.
What's a bundler?
A bundler is a tool that puts together all your JavaScript code and its dependencies and throws a new JavaScript output file with everything merged, ready for the web, commonly known as the bundle file.
Basically, Webpack bundles:
- Assets:
- images(jpg, jpeg, png, svg, etc.)
- scripts(javascript)
- styles(css)
When we structurize our project directories below, we will follow this concept.
Getting Started
Project Setup
Now that we understand what is a bundler and Webpack, we can get started with creating our project directory and initialize it with npm:
Terminalmkdir webpack-startercd webpack-starternpm init -yvim . # Or code . if you use VS Code Editor
First, let's create ./app directory in the project root. And within this app folder, let's create something that we would want Webpack to bundle for us.
Inside the app folder, create a index.html:
./app/index.html1<!DOCTYPE html>2<html lang="en">3 <head>4 <meta charset="UTF-8" />5 <meta http-equiv="X-UA-Compatible" content="IE=edge" />6 <meta name="viewport" content="width=device-width, initial-scale=1.0" />7 <title>Webpack Starter</title>8 </head>9 <body>10 <div>11 <img src="assets/images/card-1.jpg" width="800" />12 <h1>Title</h1>13 <p>14 Lorem ipsum dolor sit amet, consectetur adipisicing elit. Eligendi aut15 quisquam maiores ratione quidem veritatis sapiente expedita16 necessitatibus harum accusamus.17 </p>18 <h4>Date</h4>19 </div>20 </body>21</html>
Create the follwoing directories inside the ./app/assets folder:
images: will contain all the image resources(jpg, jpeg, png, svg, etc.)scripts: will contain javascript filesApp.js: javascript file that we would want Webpack to process for us
styles: will containt css files
You will have a structure like this:
.├── app│ ├── assets│ │ ├── images│ │ ├── scripts│ │ │ └── App.js│ │ └── styles│ └── index.html└── package.json
We will go over each directory one by one throughout the article.
Images
I've saved some default images in the images folder for demonstration purpose. You can download images by visiting here.
Scripts
./app/assets/scripts/App.js1alert('Hello, Webpack!!!')
Styles
We are not going to generate anything in the styles directory for now because we will take care of that later when we add CSS suppoprt to Webpack configuration.
Webpack Minimal Configurations
Webpack and Webpack CLI
Although we created the javascript file App.js in the scripts folder, we haven't told Webpack to look at this file and process/bundle it for us. To do that, we have to install two packages: webpack & webpack-cli:
Open up your terminal and run the following command:
Terminalnpm install webpack webpack-cli --save-dev
Note that it might take a while to finish the installations.
Webpack Configuration
The way we tell Webpack to do what we want to do is to configure webpack.config.js file.
./webpack.config.js1module.exports = {2 entry: './app/assets/scripts/App.js',3}
Remember that we created App.js file? We want to tell Webpack to find/process this file as an entry point before it builds out its internal dependency graph.
This is the minimal setup for our demonstration, but we will add more properties later.
How To Run Webpack
Now that we've configured Webpack, it is time for us to run Webpack to bundle things for us. But how? The answer is we will utilize scripts property in package.json.
./package.json1{2 "name": "webpack-starter",3 "version": "1.0.0",4 "description": "",5 "scripts": {6 "dev": "webpack",7 "test": "echo \"Error: no test specified\" && exit 1"8 },9 "keywords": [],10 "author": "",11 "license": "ISC",12 "devDependencies": {13 "webpack": "^5.72.0",14 "webpack-cli": "^4.9.2"15 }16}
Because we installed Webpack as a dev dependency, not as a global, our terminal can't understand a direct command webpack, but by using the scripts inside package.json, we can run Webpack like this:
Terminalnpm run dev
It is highly likely that you will find one warning message saying The mode option has not been set..., but for now we can ignore this.
As soon as you run the command, you will notice a brand new folder named dist, and within that folder there's a new file named main.js.
What happened behind the scenes is that the npm found the Webpack package inside node_modules in our project root and ran it for us. Then Webpack looked at App.js file and it processed it and bundled it and created the new main.js.
Webpack Further Customization
Output & Mode
We can add more properties to the webpack.config.js file for further customization.
What I want to customize here is:
- Instead of creating
dist/main.jsas defualt, I would like to changemain.jstobundled.jsand then save it to the existing./appdirectory. In other words, I want the bundled javascript file to sit withindex.htmlside by side in theappfolder. - By setting
modetodevelopment, I want to resolove the warning message that we've seen earlier.
So jump back into your webpack.config.js.
./webpack.config.js1const path = require('path')23module.exports = {4 entry: './app/assets/scripts/App.js',5 output: {6 filename: 'bundled.js',7 path: path.resolve(__dirname, 'app'),8 },9 mode: 'development',10}
Now, before we test this out again, let's be sure to delete the dist folder in the project root. We didn't want the bundled file to be output there any longer.
Let's see what we get now by running npm run dev again:
Terminalnpm run dev
Notice that we don't have any warning message any more. Now in our app folder, we have the brand new generated bundled.js file sitting by index.html.
Load bundled.js file into index.html
We now have bundled.js and index.html sitting side by side in ./app directory. However, to take our webpages to the next level by harnessing javascript, we need to load the bundled.js into the index.html.
To call javascript code from within HTML, you need the <script> element.
./app/index.html1<!DOCTYPE html>2<html lang="en">3 <head>4 <meta charset="UTF-8" />5 <meta http-equiv="X-UA-Compatible" content="IE=edge" />6 <meta name="viewport" content="width=device-width, initial-scale=1.0" />7 <title>Webpack Starter</title>8 </head>9 <body>10 <div>11 <img src="assets/images/card-1.jpg" />12 <h1>Title</h1>13 <p>14 Lorem ipsum dolor sit amet, consectetur adipisicing elit. Eligendi aut15 quisquam maiores ratione quidem veritatis sapiente expedita16 necessitatibus harum accusamus.17 </p>18 <h4>Date</h4>19 </div>2021 <script src="bundled.js"></script>22 </body>23</html>
As you see, we've added the line 21 <script> tag to load bundled.js into the index.html file. Let's save the file and open up a file explorer on your OS and drag the index.html file into the web browser. If you see a pop-up alert with 'Hello, Webpack!!!', then you successfully loaded the bundled.js into the index.html.

Watch mode
Right now, whenever we make changes in our codes, we need to run Webpack again to rebundle. Can we make Webpack rebundle automatically whenver we save changes to our source file? Absolutely yes!!! Again we will add a new property to webpack.config.js file.
So jump back into your webpack.config.js.
./webpack.config.js1const path = require('path')23module.exports = {4 entry: './app/assets/scripts/App.js',5 output: {6 filename: 'bundled.js',7 path: path.resolve(__dirname, 'app'),8 },9 mode: 'development',10 watch: true,11}
With this new configuration, please run npm run dev again. Since we set the watch option to true(line 10), Webpack will stay running and it will watch and detect any time we save a change to our source file or our entry file so that we don't need to run npm run dev manually over and over again.
Webpack Dev Server
However, we still need to refresh pages in the browser to see the actual changes made, right? Can we make our source files updated in the browser without a full reload? Yes!!! This is where webpack-dev-server comes into play to save our life.
Install webpack-dev-server
Terminalnpm install webpack-dev-server --save-dev
Update webpack.config.js
./webpack.config.js1const path = require('path')23module.exports = {4 entry: './app/assets/scripts/App.js',5 output: {6 filename: 'bundled.js',7 path: path.resolve(__dirname, 'app'),8 },9 devServer: {10 watchFiles: ['./app/**/*.html'],11 static: {12 directory: path.join(__dirname, 'app'),13 },14 hot: true,15 port: 3000,16 host: '0.0.0.0',17 },18 mode: 'development',19 watch: true,20}
We added devServer property that tells Webpack to:
reload the browser for any changes in
htmlfileswatch
./appdirectory for any changesdo hot module replacement(HMR) when we save changes to the source files
listen for requests on a port 3000
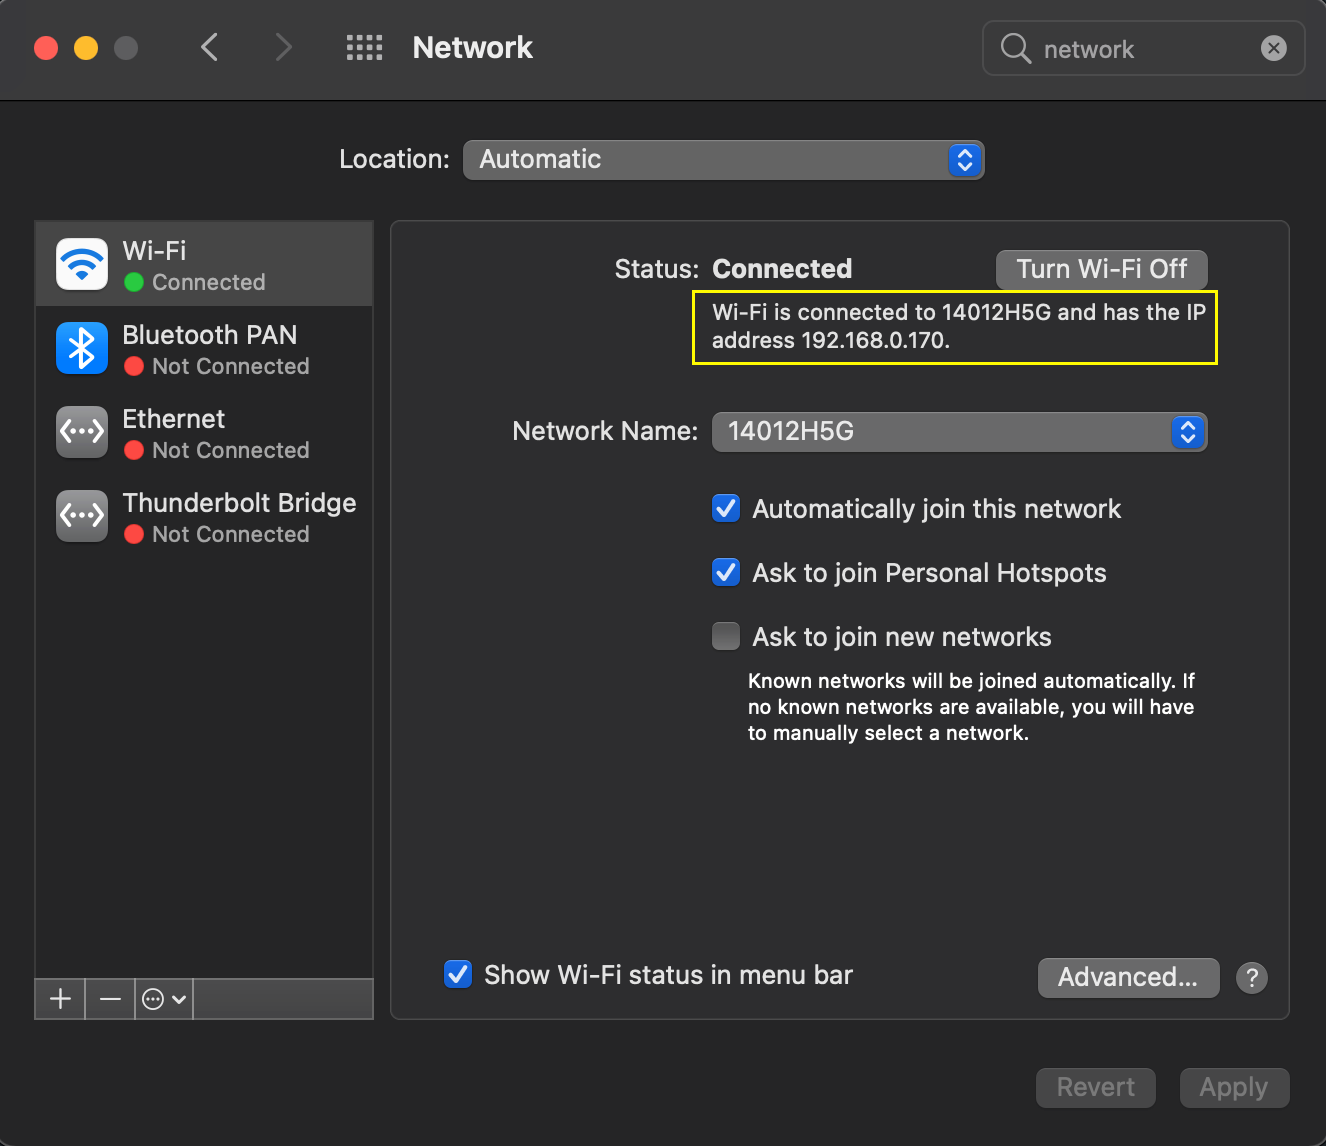
make the dev server to be accessible externally by other devices such as a tablet, a mobile phone connected to the same Wi-Fi
For example, if you use a mac os, you can open up
System Preferences > Networkto find your local ip address:![network]()
In my case, it is 192.168.0.170. I can access the same website from my mobile phone by typing
192.168.0.170:3000in my Chrome browser.
Note that we no longer need watch: true(line 19) because webpack-dev-server is told to do the same already.
Update package.json
Next, to be able to run webpack-dev-server, we need to make a slight modification on the scripts in package.json file:
./package.json1{2 "name": "webpack-starter",3 "version": "1.0.0",4 "description": "",5 "scripts": {6 "dev": "webpack",7 "dev": "webpack serve",8 "test": "echo \"Error: no test specified\" && exit 1"9 },10 "keywords": [],11 "author": "",12 "license": "ISC",13 "devDependencies": {14 "webpack": "^5.72.0",15 "webpack-cli": "^4.9.2"16 "webpack-dev-server": "^4.8.1"17 }18}
Update App.js
Lastly, we need to tell our entry point javascript file to accept updates on the fly:
./app/assets/scripts/App.js1alert('Hello, Webpack!!!')2if (module.hot) {3 module.hot.accept()4}
We no longer need alert function, so I removed it.
Test webpack-dev-server
Terminalnpm run dev
1. Make a change in HTML file
Let's jump into index.html and change Title to Title!!! in <h1>> tag.
./app/index.html1<!DOCTYPE html>2<html lang="en">3 <head>4 <meta charset="UTF-8" />5 <meta http-equiv="X-UA-Compatible" content="IE=edge" />6 <meta name="viewport" content="width=device-width, initial-scale=1.0" />7 <title>Webpack Starter</title>8 </head>9 <body>10 <div>11 <img src="assets/images/card-1.jpg" />12 <h1>Title</h1>13 <h1>Title!!!</h1>14 <p>15 Lorem ipsum dolor sit amet, consectetur adipisicing elit. Eligendi aut16 quisquam maiores ratione quidem veritatis sapiente expedita17 necessitatibus harum accusamus.18 </p>19 <h4>Date</h4>20 </div>2122 <script src="bundled.js"></script>23 </body>24</html>
You should be able to see the change immediately if you access localhost:3000.
Please note that a full page reload will happen when you save any changes to *.html file. This is different from hot module replacement in that the webpage will lose any previous states.
2. Make a change in CSS file
By the time we add CSS support to our Webpack configuration, we will be able to see hot module replacement work whenever we save changes to CSS files. Once again, this HMR differs from a full page reload that forces us to lose any state on our webpage.
One last thing I want to point out is that webpack-dev-server does not produce a new bundled javascript file to our local hard disk whenever we save changes to files. The dev server truly works with the bundled javascript file residing in memory. So even if we delete the bundled.js file from our directory, the server will still work without any issues. You can confirm this by deleting the bundled.js file manually and accessing localhost:3000/bundled.js in the web browser. You should see the bundled.js file still loaded without any problems because it is pulled from memory.
CSS Workflow With Webpack
Writing CSS is an essential part of the front-end development. There are lots of useful CSS preprocessors such as Sass, Less, Stylus, I will introduce a postprocessor, PostCSS. It is very well known that PostCSS can do the similar work as preprocessors, but it is modular and faster. PostCSS is a tool that uses JavaScript-based plugins to automate routine CSS operations. If you heard about autoprefixer, that is one of those plugins available in PostCSS ecosystem. PostCSS makes it possible to write CSS in a developer friendly way that can't be understood by a normal web browser, but it parses those codes into regular CSS codes that the browser can understand.
Add CSS Support To Webpack Configuration
Before we configure PostCSS, let's start small by making a regular CSS work with Webpack.
Create a styles.css
./app/assets/styles/styles.css1body {2 color: blue;3}
Import the styles.css in App.js
We will import this styles.css in App.js. The reason why we import styles.css in javascript file instead of injecting it into html using stylesheet is very important for our development workflow and its efficiency. However, we will have used the stylesheet to load CSS later when we actually serve our website to public. We will tackle this in the Part 2 - CSS Artchitecture.
./app/assets/scripts/App.js1import '../styles/styles.css'23if (module.hot) {4 module.hot.accept()5}
Install css-loader & style-loader
In order to tell Webpack to make CSS workflow, we need to install two dependencies:
- The
css-loaderinterprets@importandurl()likeimport/require()and will resolve them. - The
style-loaderinjects CSS into the DOM.
Terminalnpm install css-loader style-loader --save-dev
Configure webpack.config.js
Now it is time to tell Webpack to use these dependencies to handle CSS.
So jump back into your webpack.config.js. To configure CSS workflow, we will use modules, rules properties:
./webpack.config.js1const path = require('path')23module.exports = {4 entry: './app/assets/scripts/App.js',5 output: {6 filename: 'bundled.js',7 path: path.resolve(__dirname, 'app'),8 },9 devServer: {10 watchFiles: ['./app/**/*.html'],11 static: {12 directory: path.join(__dirname, 'app'),13 },14 hot: true,15 port: 3000,16 host: '0.0.0.0',17 },18 mode: 'development',19 module: {20 rules: [21 {22 test: /\.css$/i,23 use: [24 'style-loader',25 {26 loader: 'css-loader',27 options: { url: false },28 },29 ],30 },31 ],32 },33}
Basically, what the added codes do is to tell Webpack to test if any file is CSS. If so, use css-loader, style-loader. By setting the url option to false, the css-loader won't attempt to handle any images we reference in our CSS. That is, we'll manage our image files manually.
Now let's test if the CSS workflow works:
Terminalnpm run dev
This will generate a new bundled.js file with the styles.css incoprated. Howerver,
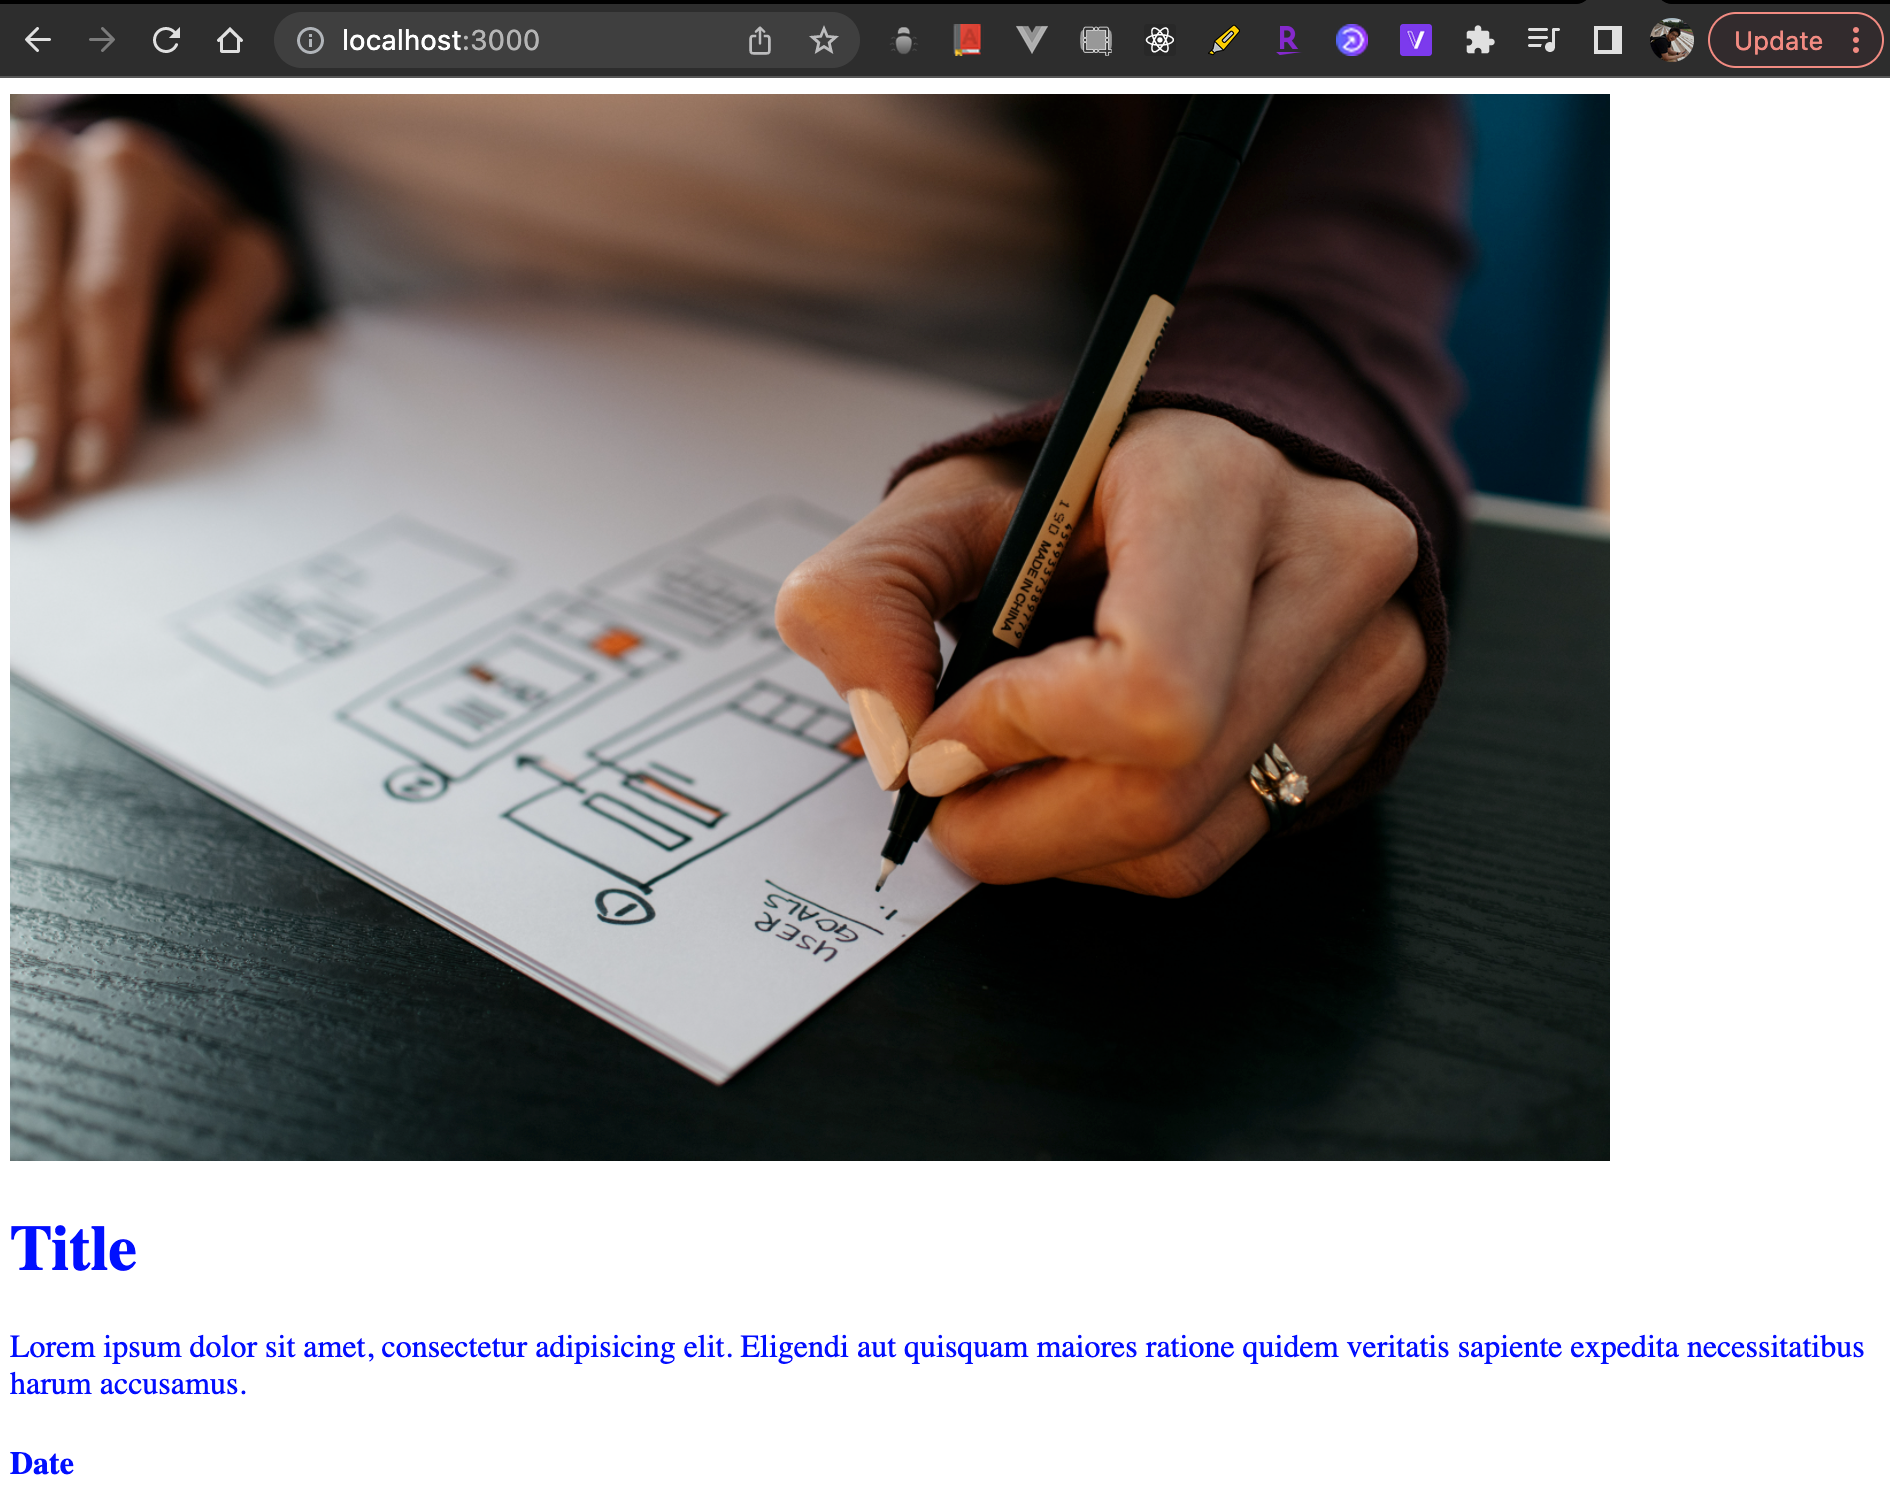
Open up your web browser and access localhost:3000 again. You should see the text changed to blue immediately with the help of webpack-dev-server and hot module replacement we've configured earlier.

Add PostCSS Support To Webpack Configuration
Install postcss-loader and 3 plugins
Terminalnpm install postcss-loader postcss-simple-vars postcss-nested autoprefixer --save-dev
| Dependencies | Usage |
|---|---|
postcss-loader | loads CSS with PostCSS |
postcss-simple-vars | supports for Sass-style variables |
postcss-nested | unwraps nested rules |
autoprefixer | adds vendor prefixes |
Configure webpack.config.js
./webpack.config.js1const path = require('path')23const postCSSPlugins = [4 require('postcss-simple-vars'),5 require('postcss-nested'),6 require('autoprefixer'),7]89module.exports = {10 entry: './app/assets/scripts/App.js',11 output: {12 filename: 'bundled.js',13 path: path.resolve(__dirname, 'app'),14 },15 devServer: {16 watchFiles: ['./app/**/*.html'],17 static: {18 directory: path.join(__dirname, 'app'),19 },20 hot: true,21 port: 3000,22 host: '0.0.0.0',23 },24 mode: 'development',25 module: {26 rules: [27 {28 test: /\.css$/i,29 use: [30 'style-loader',31 {32 loader: 'css-loader',33 options: { url: false },34 },35 {36 loader: 'postcss-loader',37 options: { postcssOptions: { plugins: postCSSPlugins } },38 },39 ],40 },41 ],42 },43}
With this new configuration, let's add some PostCSS-specific syntax and try that out:
./app/assets/styles/styles.css1body {2 color: blue;3}45$mainRed: red;67.card {8 h1 {9 color: $mainRed;10 }11}
Let's target <div> element with .card selector in index.html:
./app/index.html1<!DOCTYPE html>2<html lang="en">3 <head>4 <meta charset="UTF-8" />5 <meta http-equiv="X-UA-Compatible" content="IE=edge" />6 <meta name="viewport" content="width=device-width, initial-scale=1.0" />7 <title>Webpack Starter</title>8 </head>9 <body>10 <div>11 <div class="card">12 <img src="assets/images/card-1.jpg" width="800" />13 <h1>Title</h1>14 <p>15 Lorem ipsum dolor sit amet, consectetur adipisicing elit. Eligendi aut16 quisquam maiores ratione quidem veritatis sapiente expedita17 necessitatibus harum accusamus.18 </p>19 <h4>Date</h4>20 </div>2122 <script src="bundled.js"></script>23 </body>24</html>
Spin up the dev server again and access localhost:3000.
Terminalnpm run dev
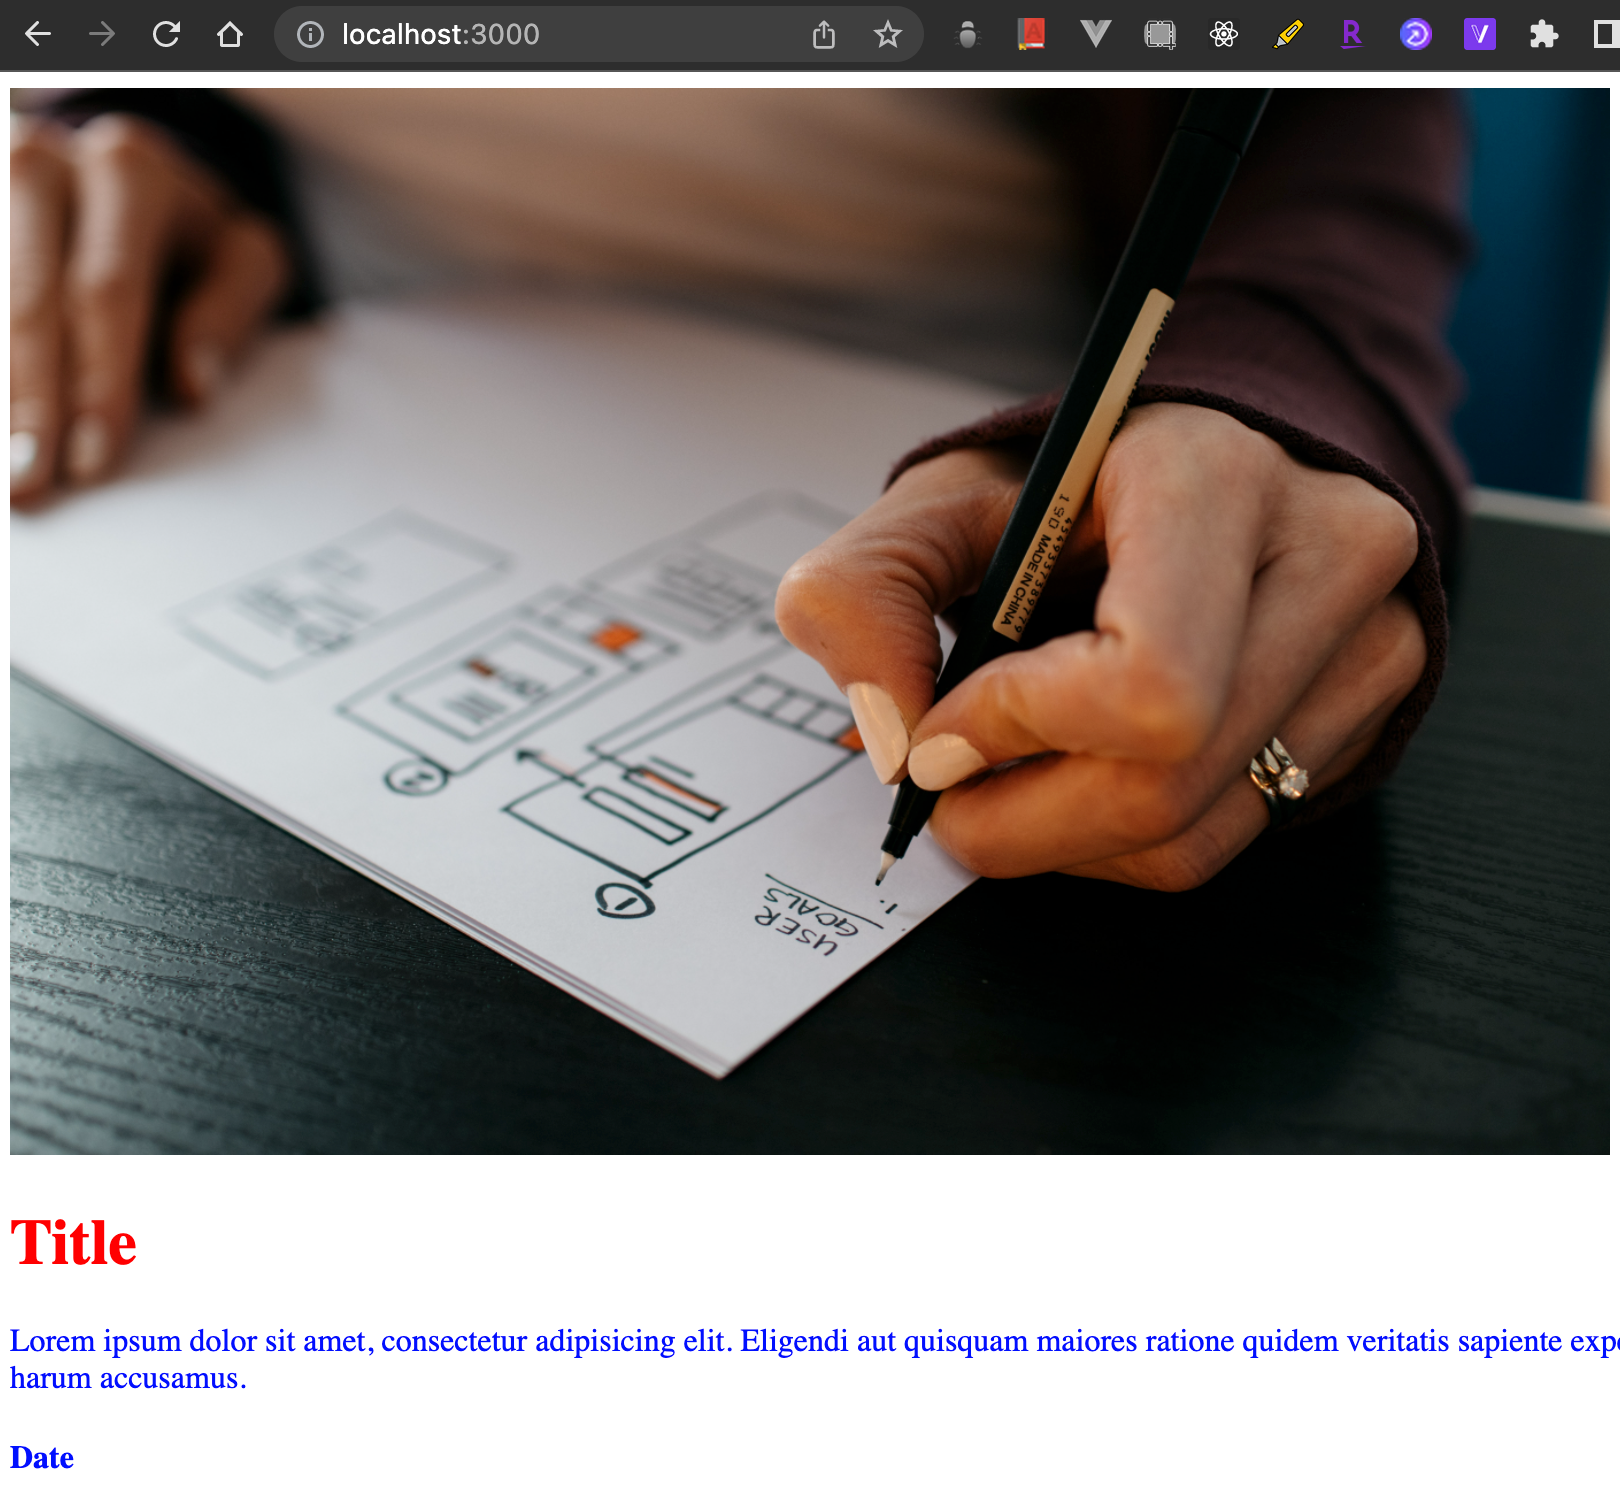
Jump back on the browser. As we expected, the color on Title has been changed into red.

What's Next
We went through a lot in this Part 1. With all the basic configurations done, we will take another step to talk about CSS architecture with Webpack in the Part 2. I hope you enjoyed reading and please feel free to leave any questions or comments if you have.
all posts
Comments