Docker Basics Part 1
Images & Containers
Images
- Images are one of the two core building blocks Docker is all about (the other one is "Containers").
- Images are blueprints / templates for containers. They are read-only and contain the application as well as the necessary application environment (operating system, runtimes, tools, ...).
- Images do not run themselves, instead, they can be executed as containers.
- Images are either pre-built (e.g. official Images you find on DockerHub) or you build your own Images by defining a Dockerfile.
- Dockerfiles contain instructions which are executed when an image is built ( docker build . ), every instruction then creates a layer in the image. Layers are used to efficiently rebuild and share images.
- The CMD instruction is special: It's not executed when the image is built but when a container is created and started based on that image.
Containers
- Containers are the other key building block Docker is all about.
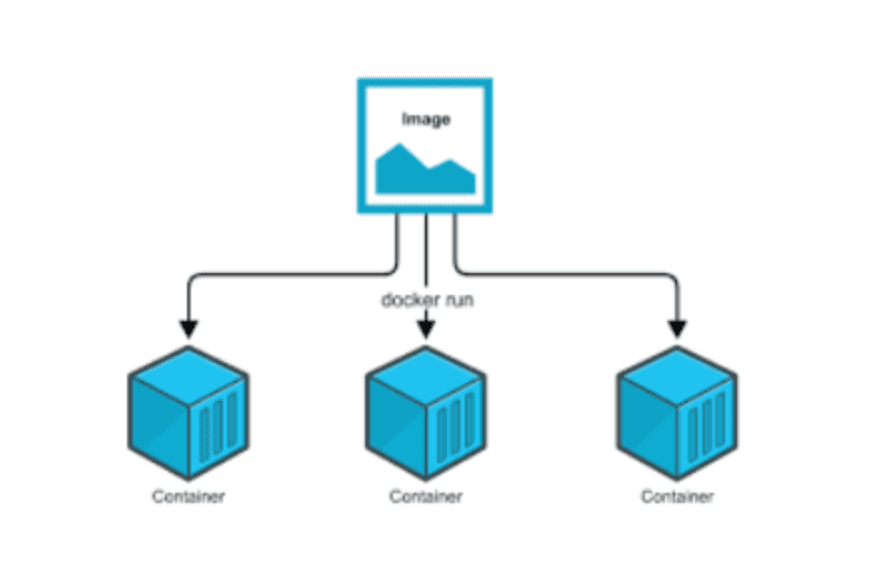
- Containers are running instances of Images. When you create a container (via docker run ), a thin read-write layer is added on top of the Image.
- Multiple Containers can therefore be started based on one and the same Image. All
- Containers run in isolation, i.e. they don't share any application state or written data.
- You need to create and start a Container to start the application which is inside of a Container. So it's Containers which are in the end executed - both in development and production.
Key Docker Commands
For a full list of all commands, add --help after a command - e.g. docker --help , docker run --help etc. Also view the official docs for a full, detailed documentation of ALL commands and features: https: //docs.docker.com/engine/reference/run/
Important: This can be overwhelming! You'll only need a fraction of those features and commands in reality!
docker build .: Build a Dockerfile and create your own Image based on the file-t NAME:TAG: Assign a NAME and a TAG to an image
docker run IMAGE_NAME: Create and start a new container based on image IMAGENAME (or use the image id)--name NAME: Assign a NAME to the container. The name can be used for stopping and removing etc.-d: Run the container in detached mode - i.e. output printed by the container is not visible, the command prompt / terminal does NOT wait for the container to stop-it: Run the container in "interactive" mode - the container / application is then prepared to receive input via the command prompt / terminal. You can stop the container with CTRL + C when using the -it flag--rm: Automatically remove the container when it's stopped
docker ps: List all running containers-a: List all containers - including stopped ones
docker images: List all locally stored imagesdocker rm CONTAINER: Remove a container with name CONTAINER (you can also use the container id)docker rmi IMAGE: Remove an image by name / iddocker container prune: Remove all stopped containersdocker image prune: Remove all dangling images (untagged images)-a: Remove all locally stored images
docker push IMAGE: Push an image to DockerHub (or another registry) - the image name/ tag must include the repository name/ urldocker pull IMAGE: Pull (download) an image from DockerHub (or another registry) - this is done automatically if you just docker run IMAGE and the image wasn't pulled before
You might also like posts tagged with #docker:
Comments