Overview
This article shows you how to add social share buttons to your Gatsby blog post by using react-share package.
Why you need social share buttons
Social share buttons help create a presence on social media platforms as well as providing other benefits for your website:
1. It can improve user experience
- Users on your website can quickly share your conent not going through all the hassles like copying and pasting a resource url to social media. Just one click and you're done.
2. It can help SEO
- Google determines search results listings by using many ranking signals, among them are the number of times that content is shared, tweeted, liked, or posted to other social media.
3. It can boost brand exposure
- By people sharing your contents, it is possible that content is getting introduced to an entirely new group of people. As a result, it could bring new users to your website.
4. It can improve reach to your target audience
- Let's say now you've written this rich content blog post. But does it reach to right target audience. If you've written a tech blog, people sharing it might share it to tech commnunity, forum, etc. In turn, it reaches to more relavant target audience.
Initial setup
Install
react-sharepackageTerminalnpm install react-share
Implementation
We will 1) create a new component for social share buttons and then 2) render it inside a blog post template that is going to be used to create each blog post.
SocialShareButtons component
./src/components/SocialShareButtons.js1import React from 'react'2import styled from 'styled-components'3import {4 FacebookShareButton,5 LinkedinShareButton,6 TwitterShareButton,7 EmailShareButton,8 FacebookIcon,9 LinkedinIcon,10 TwitterIcon,11 EmailIcon,12} from 'react-share'1314const size = 3215const round = true1617const SocialShareButtons = ({ url, title, description }) => (18 <Wrapper>19 <FacebookShareButton url={url} quote={description}>20 <FacebookIcon size={size} round={round} />21 </FacebookShareButton>2223 <LinkedinShareButton url={url} title={title} summary={description}>24 <LinkedinIcon size={size} round={round} />25 </LinkedinShareButton>2627 <TwitterShareButton url={url} title={description}>28 <TwitterIcon size={size} round={round} />29 </TwitterShareButton>3031 <EmailShareButton url={url} title={description}>32 <EmailIcon size={size} round={round} />33 </EmailShareButton>34 </Wrapper>35)3637export default SocialShareButtons3839const Wrapper = styled.div`40 display: flex;41 align-items: center;42 margin-right: 10px;43 transition: all 0.2s ease-out;44 gap: 0.5rem;45`
Render SocialShareButtons inside Blog Post Template
This is a post-template.js that I currently use to build each page of post in this site. Note that I show only core part of the codes here. The entire source code is linked here.
As you see in the codes, I added the SocialShareButtons component to the post template so that Gastby can create pages with it in build time.
./src/templates/post-template.js1import React from 'react'2import Layout from '../components/Layout'3import TagsList from '../components/TagsList'4import TableOfContents from '../components/TableOfContents'5import Seo from '../components/Seo'6import Banner from '../components/Banner'7import PrevAndNext from '../components/PrevAndNext'8import Comments from '../components/Comments'9import SocialShareButtons from '../components/SocialShareButtons'10import styled from 'styled-components'11import { graphql } from 'gatsby'12import { MDXRenderer } from 'gatsby-plugin-mdx'13import { GatsbyImage, getImage } from 'gatsby-plugin-image'1415const PostTemplate = ({ data, pageContext }) => {16 const url = typeof window !== 'undefined' ? window.location.href : ''17 const pathName = typeof window !== 'undefined' ? window.location.pathname : ''1819 const {20 title,21 tags,22 image,23 date,24 embeddedImages,25 videoSourceURL,26 videoTitle,27 } = data.mdx.frontmatter2829 const { previousPost, nextPost } = pageContext3031 const { body, tableOfContents, excerpt } = data.mdx3233 const description = title ? title : excerpt3435 const isThereTableOfContent = Object.keys(tableOfContents).length !== 03637 return (38 <Layout>39 <Seo40 title={title}41 description={excerpt}42 image={image.childImageSharp.resize}43 pathname={pathName}44 />45 <Wrapper toc={isThereTableOfContent}>46 {/* Table of Contents */}47 {isThereTableOfContent && (48 <TableOfContents items={tableOfContents.items} />49 )}50 {/* Post Info */}51 <article className='mdx-page'>52 <GatsbyImage53 image={getImage(image)}54 alt={title}55 className='main-img'56 />57 <div className='post-info'>58 <h1>{title}</h1>59 {tags?.length > 0 && <TagsList tags={tags} isPost={true} />}60 <p>{date}</p>61 <div className='underline' />62 <div className='social-buttons-top'>63 <SocialShareButtons url={url} description={description} />64 </div>65 </div>66 <MDXRenderer67 embeddedImages={embeddedImages}68 videoSourceURL={videoSourceURL}69 videoTitle={videoTitle}70 >71 {body}72 </MDXRenderer>73 <div className='social-buttons'>74 <span>If you found this article informative, please share: </span>75 <SocialShareButtons url={url} description={description} />76 </div>77 <PrevAndNext prev={previousPost} next={nextPost} />78 <Comments />79 </article>8081 {/* Banner on the right side */}82 <article>83 <Banner isPost={true} />84 </article>85 </Wrapper>86 </Layout>87 )88}8990export default PostTemplate
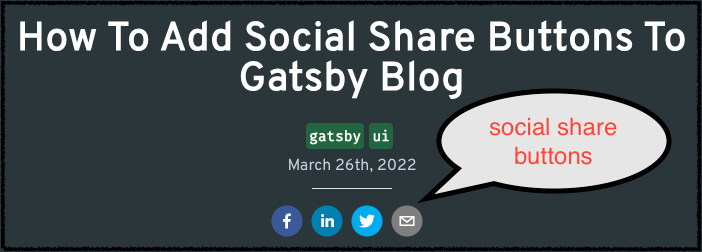
Just like you see the social share buttons appeared on the top and the bottom of this blog post page, here is two screen shots for references:


You might also like posts tagged with #gatsby:
Comments