How To Add Utterances Comment System To Your Gatsby Blog
March 25th, 2022
Overview
This article shows you how to add utterances light weight comments widget to your Gatsby website. The widget is built on GitHub issues.
Limitations of Utterances Comments System
- Needs Github authentication by users to make a comment
- There is no reply functionality
Initial Setup
Create Public Github Repository
- This repository will be linked to Utterance Github Application that we're going to install below.
Install Utterance Github Application
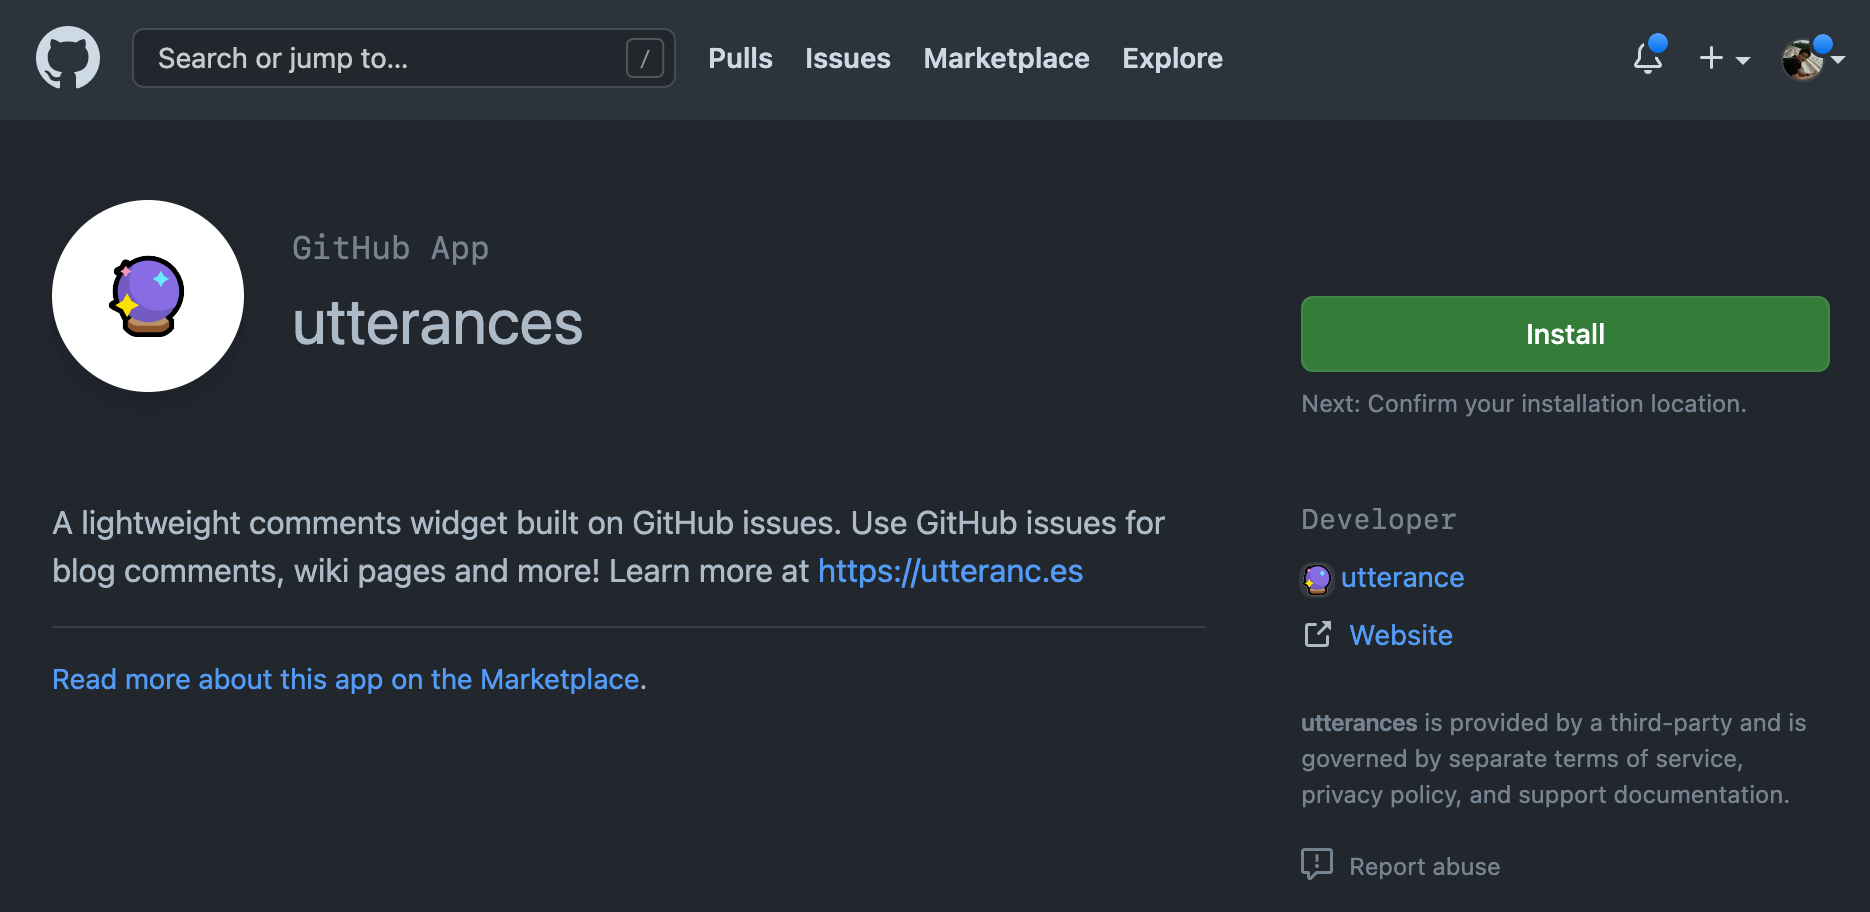
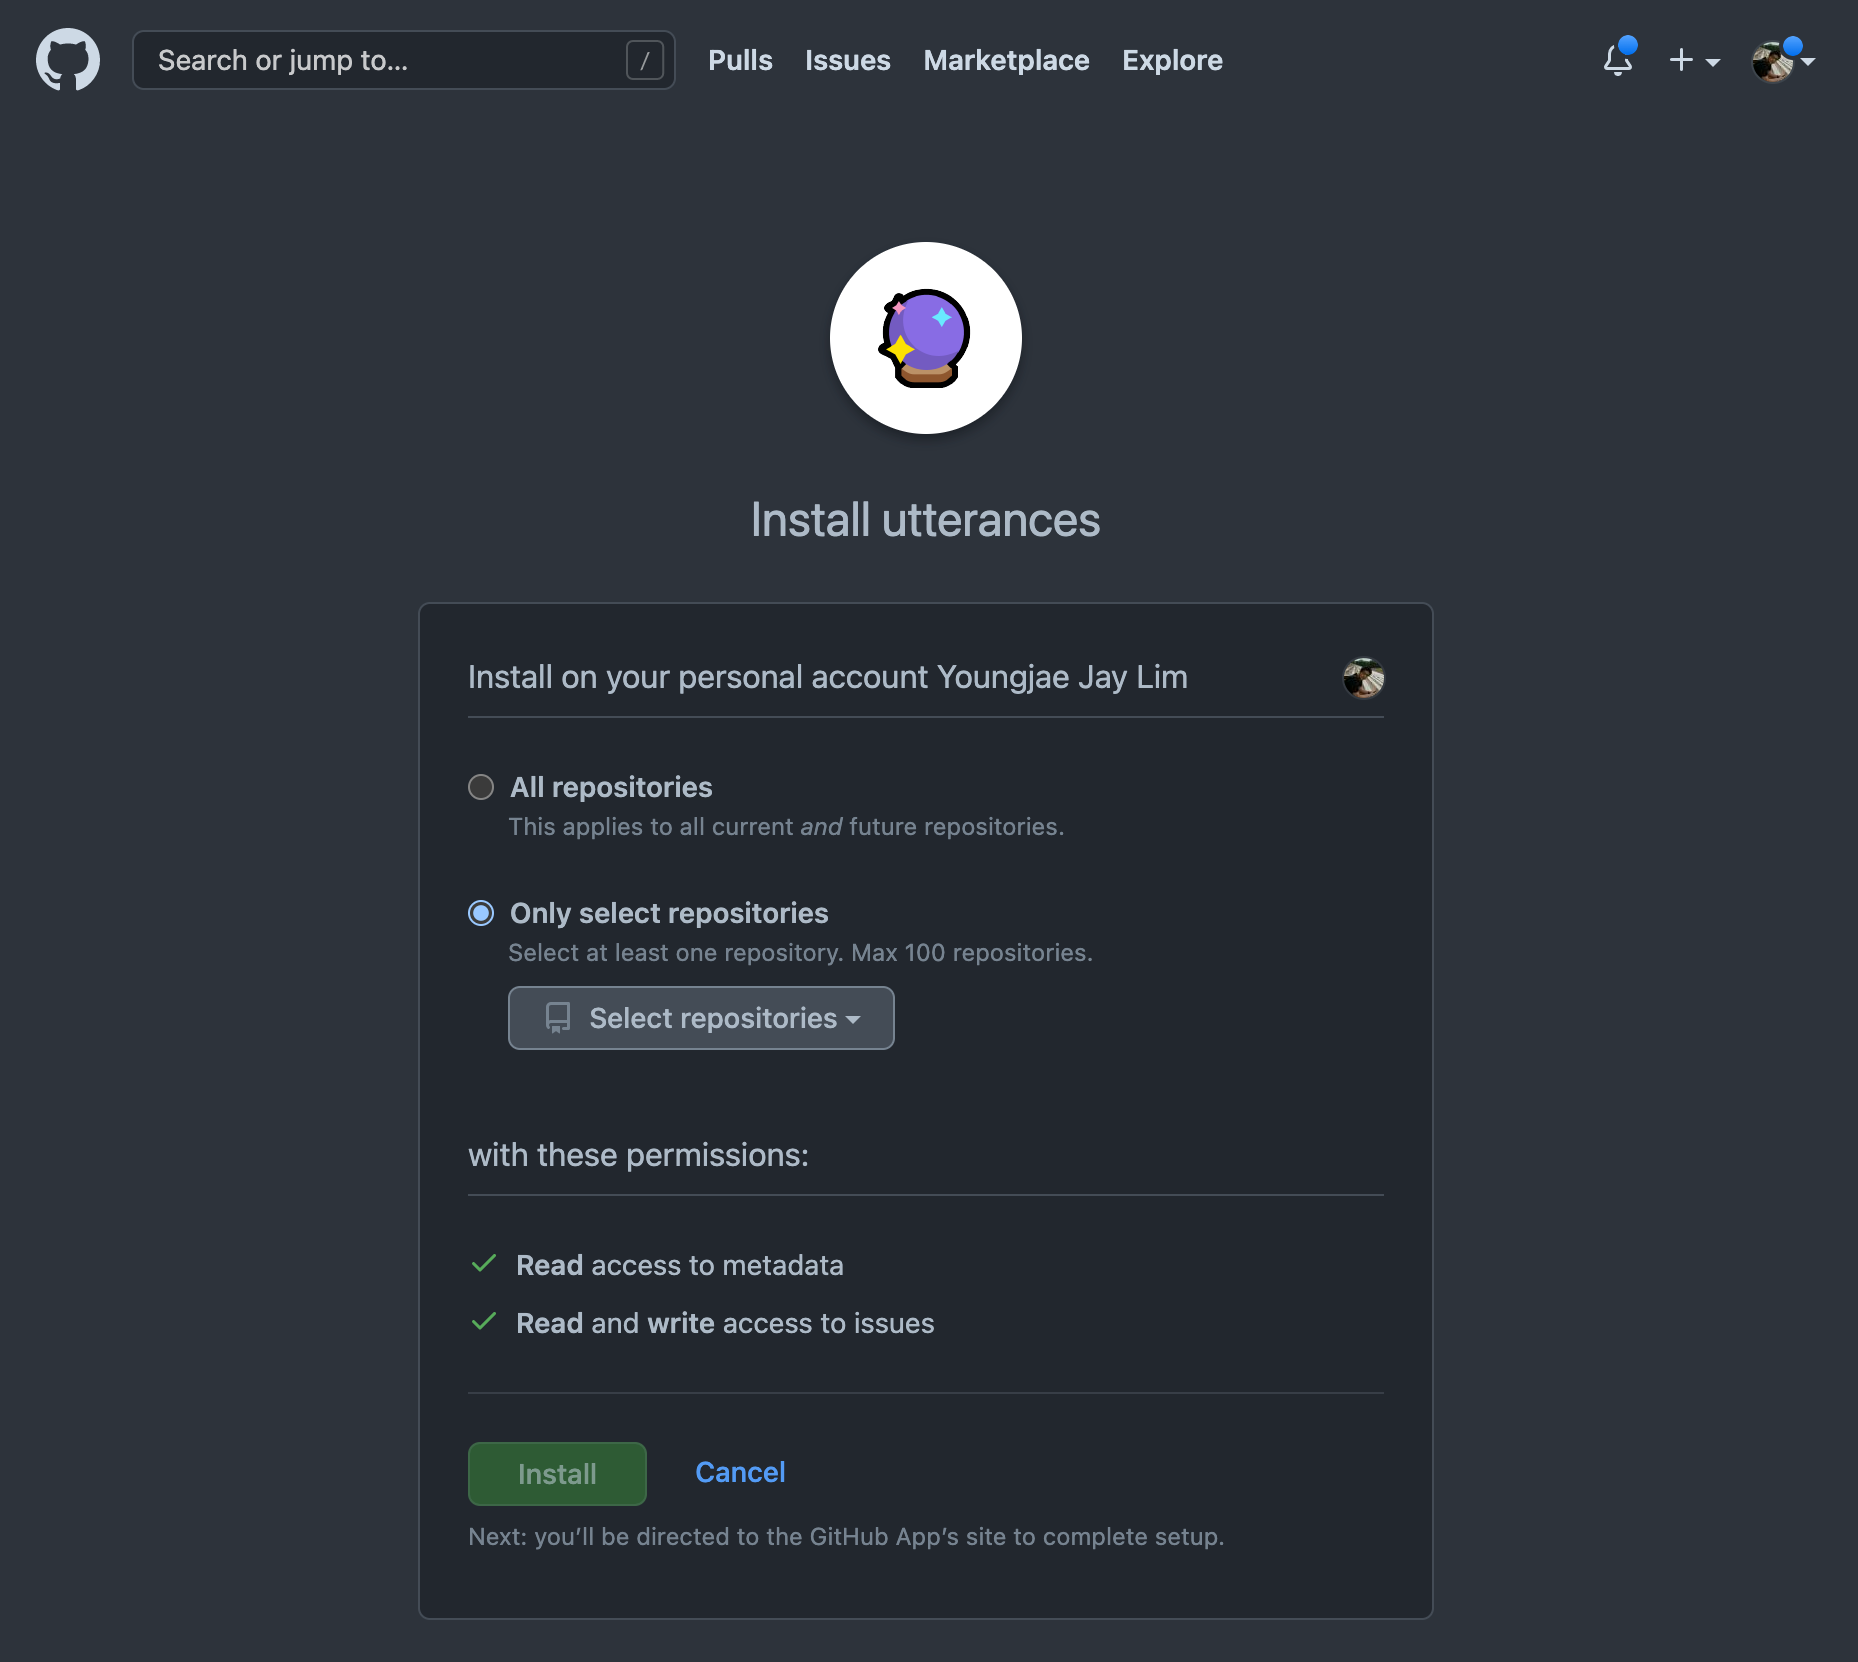
Select the repository that you've created above from the dropdown list:
Create Comments Component
The offical utterances doc instructs us to add the following script tag to your blog template.

Howerver, I use Gatsby framework, so I had to create a React component to configure the settings. Note that the component we crate here is to be imported in our blog post template later.
./src/components/Comments.js1import React, { useEffect } from 'react'23const COMMENTS_ID = 'comments-container'45const Comments = () => {6 useEffect(() => {7 if (!process.env.GATSBY_COMMENTS_REPO) return89 const script = document.createElement('script')10 script.src = 'https://utteranc.es/client.js'11 script.setAttribute('repo', process.env.GATSBY_COMMENTS_REPO)12 script.setAttribute('issue-term', 'pathname')13 script.setAttribute('theme', 'icy-dark')14 script.setAttribute('crossorigin', 'anonymous')15 script.async = true1617 const comments = document.getElementById(COMMENTS_ID)18 if (comments) comments.appendChild(script)1920 // This function will get called when the component unmounts21 // To make sure we don't end up with multiple instances of the comments component22 return () => {23 const comments = document.getElementById(COMMENTS_ID)24 if (comments) comments.innerHTML = ''25 }26 }, [])2728 return (29 <div>30 <h4>Comments</h4>31 <div id={COMMENTS_ID} />32 </div>33 )34}3536export default Comments
Setup Gatsby Environment Variable
For your local development
Let's add the following codes to the top of gatsby-config.js to use an environment variable in Gatsby:
./gatsby-config.js1require('dotenv').config({2 path: `.env`,3})
Then create .env file in your project root and add a key and a value pair to indicate our repo for uttterances comment system:
./.env1GATSBY_COMMENTS_REPO=<github_owner_name>/<github_repository_name_connected_to_utterances>
Example
GATSBY_COMMENTS_REPO=johndoe/utterances-comments
With this configuration, now the Comments component that we've created above will have access the env variable using process.env.GATSBY_COMMENTS_REPO syntax.
For your production development
The above setting definitely works in the dev environment, but how about production environment? We have two concerns to address:
- Because we are not pushing our
.envfile to the remote repository by adding.envto the.gitignorefile, we have to add one manually to our Github repository Settings:
Note that pushing .env file with sensitive data to a remote repository is always dangerous practive, so it should be avoided.
- Because I publish my site to Github pages using GitHub Actions, the workflows script needs to be able to access and read the environment variable during the deploying process. To set it:
For those who missed reading my article on how to deploy Gatsby website to github pages using github actions, please refer to How To Deploy Gatsby Website To GitHub Pages Using GitHub Actions.
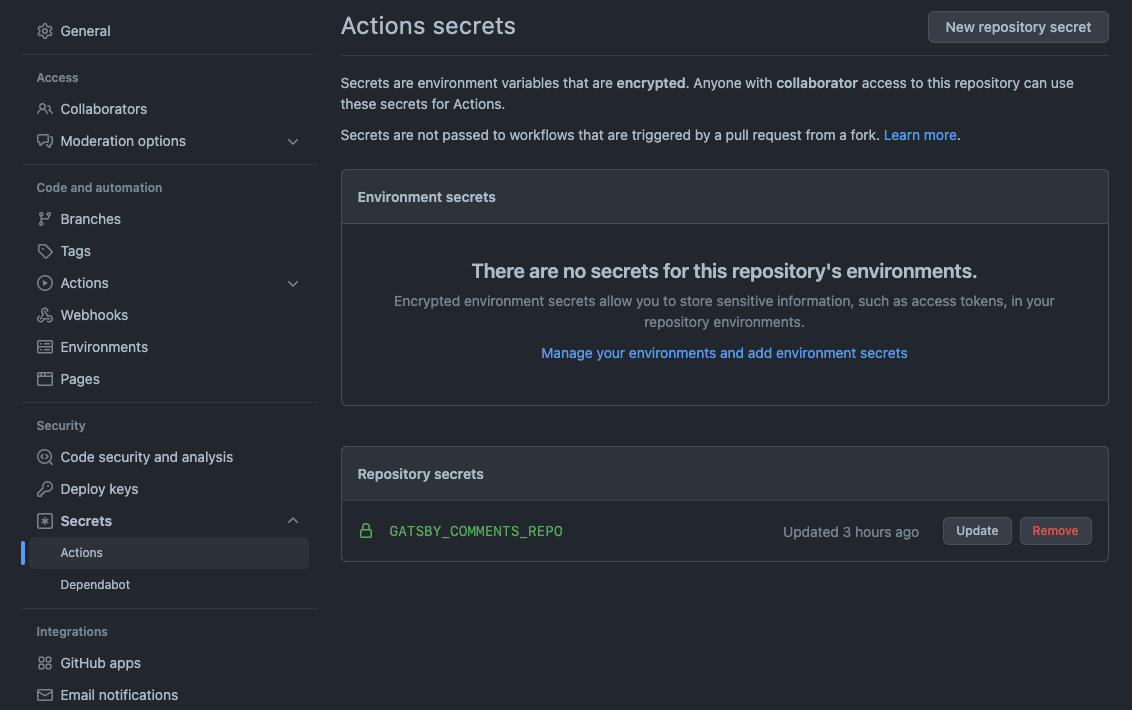
Add a Github Secret Key
Go to GitHub>Settings of your repository and add a secret key:
Update Github Actions
Then let's make some changes to the deploy.yml that creates the same .env file to the original github actions that I've been using so far:
./github/workflows/deploy.yml1# This is a basic workflow to help you get started with Actions2name: CI34# Controls when the action will run.5on:6 # Triggers the workflow on push or pull request events but only for the dev branch7 push:8 branches: [dev]9 pull_request:10 branches: [dev]11 # Allows you to run this workflow manually from the Actions tab12 workflow_dispatch:1314# A workflow run is made up of one or more jobs that can run sequentially or in parallel15jobs:16 # This workflow contains a single job called "build"17 build:18 # The type of runner that the job will run on19 runs-on: ubuntu-latest2021 # Steps represent a sequence of tasks that will be executed as part of the job22 steps:23 # Checks-out your repository under $GITHUB_WORKSPACE, so your job can access it24 - uses: actions/checkout@v22526 - name: Setup Node.js environment27 uses: actions/setup-node@v2.1.528 with:29 # Version Spec of the version to use. Examples: 12.x, 10.15.1, >=10.15.030 node-version: 1631 - run: npm ci3233 - run: npm run build --if-present34 - run: |35 touch .env36 echo GATSBY_COMMENTS_REPO=${{ secrets.GATSBY_COMMENTS_REPO }} >> .env37 npm run build --if-present3839 - run: npm test4041 - name: Deploy to GitHub Pages42 uses: JamesIves/github-pages-deploy-action@v4.2.543 with:44 branch: gh-pages # The branch the action should deploy to.45 folder: public # The folder the action should deploy.
Import the Comment Component
The last part of making Utterances comment work in each blog post is to import the Comments.js component and use it in the blog post template.
The following is the part of codes in post-template.js used in this website. To see the entire codes, please refer to this.
post-template.js is a template that is used to create new pages for blog posts programmatically using Gatsby's filesystem route api.
./src/templates/post-template.js1...2...3...4import Comments from '../components/Comments'5...6...7...8const PostTemplate = ({ data, pageContext }) => {9...10...11...12 return (13 <Layout>14 <Seo15 title={title}16 description={excerpt}17 image={image?.childImageSharp.resize}18 pathname={pathName}19 />20 <Wrapper toc={isThereTableOfContent}>21 {/* Table of Contents */}22 {isThereTableOfContent && (23 <TableOfContents items={tableOfContents.items} />24 )}25 {/* Post Info */}26 <article className='mdx-page'>27 <GatsbyImage28 image={getImage(image)}29 alt={title}30 className='main-img'31 />32 <div className='post-info'>33 <h1>{title}</h1>34 {tags?.length > 0 && <TagsList tags={tags} isPost={true} />}35 <p>{date}</p>36 <div className='underline' />37 <div className='social-buttons-top'>38 <SocialShareButtons url={url} description={description} />39 </div>40 </div>41 <MDXRenderer42 embeddedImages={embeddedImages}43 videoSourceURL={videoSourceURL}44 videoTitle={videoTitle}45 >46 {body}47 </MDXRenderer>48 <div className='social-buttons'>49 <span>If you found this article informative, please share: </span>50 <SocialShareButtons url={url} description={description} />51 </div>52 <PrevAndNext prev={previousPost} next={nextPost} />53 {relatedPosts?.length > 0 && (54 <YouMightAlsoLike posts={relatedPosts} tag={tags[0]} />55 )}56 <Comments />57 </article>5859 {/* Banner on the right side */}60 <article>61 <Banner isPost={true} />62 </article>63 </Wrapper>64 </Layout>6566)67}6869export default PostTemplate70...
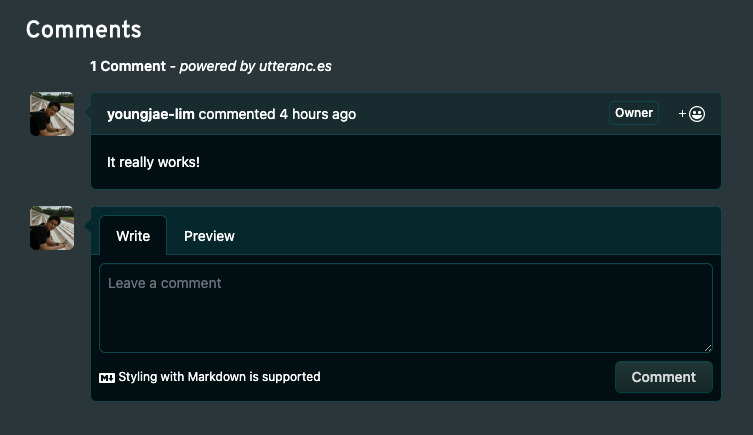
The following is the capture of the same utterances comment embedded in this article.
You might also like posts tagged with #gatsby:
Comments